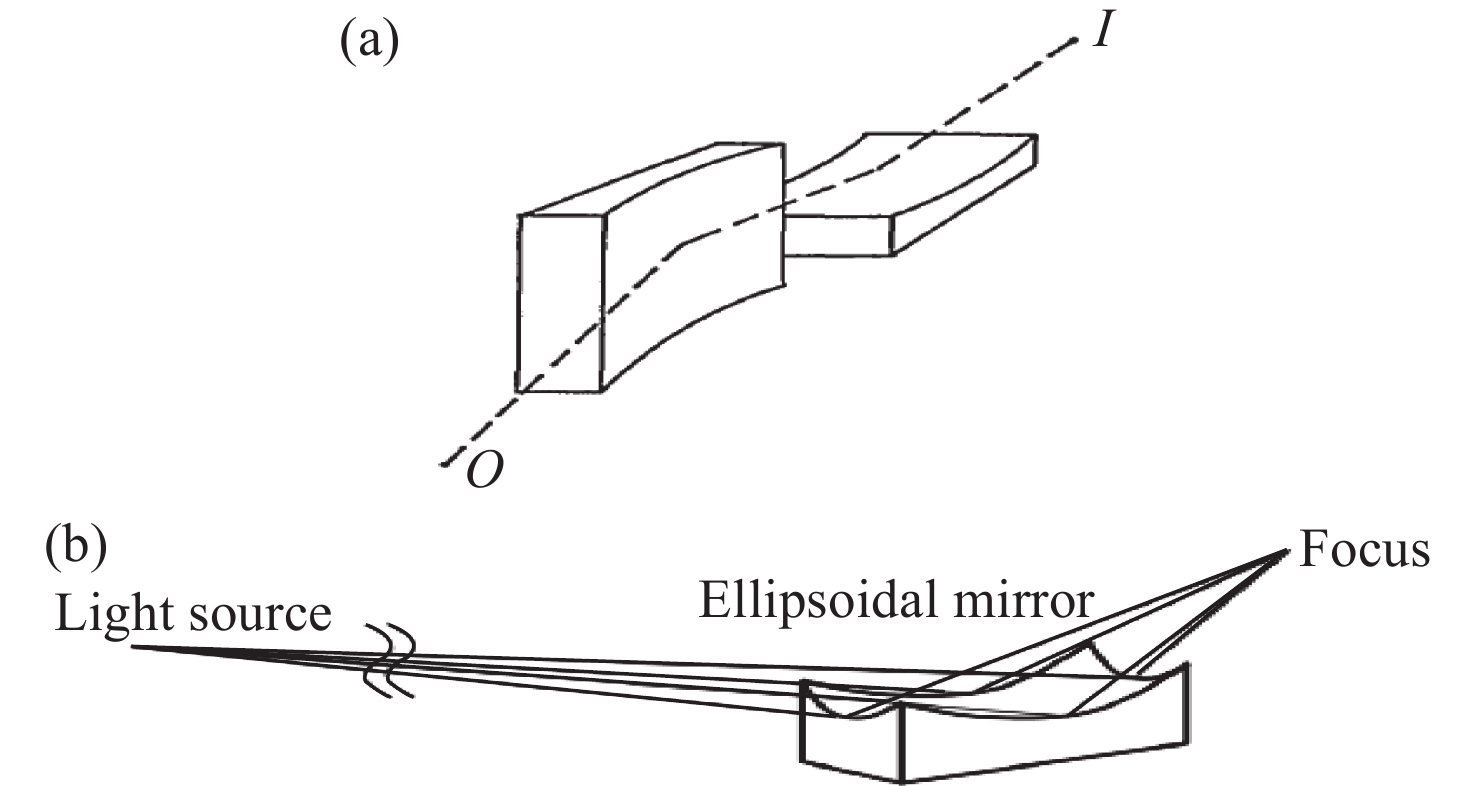
[1] KIRKPATRICK P, BAEZ A V. Formation of optical images by X-rays[J]. Journal of the Optical Society of America, 1948, 38(9): 766-774.
[2] GIEWEKEMEYER K, WILKE R N, OSTERHOFF M. Versatility of a hard X-ray kirkpatrick–baez focus characterized by ptychography[J]. Journal of Synchrotron Radiation, 2013, 20(3): 490-497.
[3] NAULLEAU P P, GOLDBERG K A, BATSON P J. Tolerancing of diffraction-limited Kirkpatrick-Baez synchrotron beamline optics for extreme-ultraviolet metrology[J]. Applied Optics, 2001, 40(22): 3703-3709.
[4] MATSUYAMA S, YAMADA J, KOHMURA Y. Full-field X-ray fluorescence microscope based on total-reflection advanced Kirkpatrick-Baez mirror optics[J]. Optics Express, 2019, 27(13): 18318-18328.
[5] KODAMA R, IKEDA N, KATO Y. Development of an advanced Kirkpatrick-Baez microscope[J]. Optics Letters, 1996, 21(17): 1321-1323.
[6] HUDEC R, PINA L, VAN INNEMAN A. Lightweight x-ray optics for future space missions[J]. Proceedings of SPIE, 2003, 4851: 656-665.
[7] YUMOTO H, MIMURA H, KOYAMA T. Focusing of X-ray free-electron laser pulses with reflective optics[J]. Nature Photonics, 2012, 7(1): 43-47.
[8] SIEWERT F, BUCHHEIM J, BOUTET S. Ultra-precise characterization of LCLS hard X-ray focusing mirrors by high resolution slope measuring deflectometry[J]. Optics Express, 2012, 20(4): 4525-4536.
[9] HEYNACHER E, REINHARDT D. Measuring equipment for testing the directrix of high-resolution wolter-type telescopes[J]. Proceedings of SPIE, 1979, 184: 167-169.
[10] COCCO D, IDIR M, MORTON D. Advances in X-ray optics: from metrology characterization to wavefront sensing-based optimization of active optics[J]. Nuclear Instruments and Methods in Physics Research Section A: Accelerators, Spectrometers, Detectors and Associated Equipment, 2018, 907: 105-115.
[11] QIAN S, TAKACS P. Nanoaccuracy Surface Figure Metrology of Precision Optics[M]. COCCO L. Modern Metrology Concerns. Rijeka: Intech Open, 2012.
[12] OWADA S, TOGAWA K, INAGAKI T. A soft X-ray free-electron laser beamline at SACLA: the light source, photon beamline and experimental station[J]. Journal of Synchrotron Radiation, 2018, 25(1): 282-288.
[13] YANDAYAN T, GECKELER R D, SIEWERT F. Pushing the limits: latest developments in angle metrology for the inspection of ultra-precise synchrotron optics[J]. Proceedings of SPIE, 2014, 9206: 92060F.
[14] TAKACS P Z, FENG S C K, CHURCH E L. Long trace profile measurements on cylindrical aspheres[J]. Proceedings of SPIE, 1989, 966: 354-364.
[15] TAKACS P Z, QIAN SH N, COLBERT J. Design of a long trace surface profiler[J]. Proceedings of SPIE, 1987, 749: 59-64.
[16] SIEWERT F, LAMMERT H, NOLL T. Advanced metrology: an essential support for the surface finishing of high performance x-ray optics[J]. Proceedings of SPIE, 2005, 5921: 592101.
[17] SIEWERT F, ZESCHKE T, ARNOLD T. Linear chirped slope profile for spatial calibration in slope measuring deflectometry[J]. Review of Scientific Instruments, 2016, 87(5): 051907.
[18] OTSUBO M, OKADA K, TSUJIUCHI J. Measurement of large plane surface shapes by connecting small-aperture interferograms[J]. Optical Engineering, 1994, 33(2): 608-613.
[19] IRICK S C, MCKINNEY W R, LUNT D L J. Using a straightness reference in obtaining more accurate surface profiles from a long trace profiler[J]. Review of Scientific Instruments, 1992, 63(1): 1436-1438.
[20] QIAN SH N, LI H ZH, TAKACS P Z. Penta-Prism Long Trace Profiler (PPLTP) for measurement of grazing incidence space optics[J]. Proceedings of SPIE, 1996, 2805: 108-114.
[21] QIAN SH N, SOSTERO G, TAKACS P Z. Precision calibration and systematic error reduction in the long trace profiler[J]. Optical Engineering, 2000, 39(1): 304-310.
[22] PEDREIRA P, NICOLAS J, ŠICS I. Deflectometry encoding the measured angle in a time-dependent intensity signal[J]. Review of Scientific Instruments, 2019, 90(2): 021707.
[23] QIAN SH N, TAKACS P Z. Design of multiple-function long trace profiler[J]. Optical Engineering, 2007, 46(4): 043602.
[24] FLORIOT J, LEVECQ X, BUCOURT S. A Shack–Hartmann measuring head for the two-dimensional characterization of X-ray mirrors[J]. Journal of Synchrotron Radiation, 2008, 15(2): 134-139.
[25] IDIR M, KAZNATCHEEV K, DOVILLAIRE G. A 2 D high accuracy slope measuring system based on a stitching shack hartmann optical head[J]. Optics Express, 2014, 22(3): 2770-2781.
[26] ALCOCK S G, SAWHNEY K J S, SCOTT S. The Diamond-NOM: a non-contact profiler capable of characterizing optical figure error with sub-nanometre repeatability[J]. Nuclear Instruments and Methods in Physics Research Section A: Accelerators, Spectrometers, Detectors and Associated Equipment, 2010, 616(2-3): 224-228.
[27] QIAN SH N, IDIR M. Innovative nano-accuracy surface profiler for sub-50 nrad rms mirror test[J]. Proceedings of SPIE, 2016, 9687: 96870D.
[28] GECKELER R D. ESAD shearing deflectometry: potentials for synchrotron beamline metrology[J]. Proceedings of SPIE, 2006, 6317: 63171H.
[29] LACEY I, ADAM J, CENTERS G P. Development of a high performance surface slope measuring system for two-dimensional mapping of x-ray optics[J]. Proceedings of SPIE, 2017, 10385: 103850G.
[30] QIAN SH N, WANG Q P, HONG Y L. Multiple Functions Long Trace Profiler (LTP-MF) for national synchrotron radiation laboratory of China[J]. Proceedings of SPIE, 2005, 5921: 592104.
[31] ZENG D H, XIAO T Q, DU G H. New long trace profiler based on phase plate diffraction for optical metrology of SSRF[J]. Review of Scientific Instruments, 2006, 77(9): 093305.
[32] 李直, LI ZH, ZHANG Y, 赵洋, 李达成, LI D CH. A diffractive long trace profiler for large aspherical optics[J]. Acta Optica Sinica, 2002, 22(10): 1224-1228.
[33] SHUN L, YAN G, WEI ZH. Design of co-path scanning long trace profiler for measurement of x-ray space optical elements[J]. Proceedings of SPIE, 2010, 7544: 754421.
[34] 澎湃新闻. 高能同步辐射光源验证装置通过国家验收, 最亮光源年中开建[OL]. https:www.thepaper.cnnewsDetail_fward_2935727. 2019131.The Paper. The verification device of high energy synchrotron radiation light source has passed acceptance, the brightest light source will be built in the dle of the year [OL]. https:www.thepaper.cnnewsDetail_fward_2935727. 2019131.
[35] 秦超.同步辐射椭圆柱面压弯镜机构的研究[D]. 北京: 中国科学院大学(中国科学院上海应用物理研究所), 2018.QIN CH. Research on synchrotron radiation elliptic cylinder mirr bender[D]. Beijing: University of Chinese Academy of Sciences (Shanghai Institute of Applied Physics, Chinese Academy of Sciences), 2018. (in Chinese)
[36] SIEWERT F, BUCHHEIM J, ZESCHKE T. On the characterization of ultra-precise X-ray optical components: advances and challenges in ex situ metrology[J]. Journal of Synchrotron Radiation, 2014, 21(5): 968-975.
[37] ASSOUFID L, BRAY M, QIAN J. 3D surface profile measurements of large x-ray synchrotron radiation mirrors using stitching interferometry[J]. Proceedings of SPIE, 2002: 4728.
[38] VIVO A, LANTELME B, BAKER R. Stitching methods at the European Synchrotron Radiation Facility (ESRF)[J]. Review of Scientific Instruments, 2016, 87(5): 051908.
[39] VIVO A, BARRETT R. Fizeau stitching at the European Synchrotron Radiation Facility (ESRF)[J]. Proceedings of SPIE, 2017, 10385: 103850N.
[40] VIVO A, BARRETT R, PERRIN F. Stitching techniques for measuring X-ray synchrotron mirror topography[J]. Review of Scientific Instruments, 2019, 90(2): 021710.
[41] WIEGMANN A, STAVRIDIS M, WALZEL M. Accuracy evaluation for sub-aperture interferometry measurements of a synchrotron mirror using virtual experiments[J]. Precision Engineering, 2011, 35(2): 183-190.
[42] YAMAUCHI K, YAMAMURA K, MIMURA H. Microstitching interferometry for x-ray reflective optics[J]. Review of Scientific Instruments, 2003, 74(5): 2894-2898.
[43] OHASHI H, TSUMURA T, OKADA H. Microstitching interferometer and relative angle determinable stitching interferometer for half-meter-long x-ray mirror[J]. Proceedings of SPIE, 2007, 6704: 670405.
[44] GEVKYAN G S, CENTERS G, POLONSKA K S, et al.. Surface slope metrology of highly curved xray optics with an interferometric microscope[C]. Proceedings of SPIE, 2017, 10385: 103850H.
[45] ASSOUFID L, QIAN J, KEWISH C M. A microstitching interferometer for evaluating the surface profile of precisely figured X-ray K-B mirrors[J]. Proceedings of SPIE, 2007, 6704: 670406.
[46] ROMMEVEAUX A, BARRETT R. Micro-stitching interferometry at the ESRF[J]. Nuclear Instruments and Methods in Physics Research Section A: Accelerators, Spectrometers, Detectors and Associated Equipment, 2010, 616(2-3): 183-187.
[47] POLACK F, THOMASSET M, BROCHET S. Surface shape determination with a stitching Michelson interferometer and accuracy evaluation[J]. Review of Scientific Instruments, 2019, 90(2): 021708.
[48] MIMURA H, YUMOTO H, MATSUYAMA S, et al.. Microstitching interferometry f nanofocusing mirr optics[C]. Proceedings of SPIE, 2004, 5533: 170180.
[49] KIMURA T, OHASHI H, MIMURA H. A stitching figure profiler of large X-ray mirrors using RADSI for subaperture data acquisition[J]. Nuclear Instruments and Methods in Physics Research Section A: Accelerators, Spectrometers, Detectors and Associated Equipment, 2010, 616(2-3): 229-232.
[50] YUMOTO H, MIMURA H, KIMURA T. Stitching interferometric metrology for steeply curved x-ray mirrors[J]. Surface and Interface Analysis, 2008, 40(6-7): 1023-1027.
[51] YUMOTO H, MIMURA H, HANDA S. Stitching-angle measurable microscopic-interferometer: surface-figure metrology tool for hard X-ray nanofocusing mirrors with large curvature[J]. Nuclear Instruments and Methods in Physics Research Section A: Accelerators, Spectrometers, Detectors and Associated Equipment, 2010, 616(2-3): 203-206.
[52] YUMOTO H, KOYAMA T, MATSUYAMA S. Stitching interferometry for ellipsoidal x-ray mirrors[J]. Review of Scientific Instruments, 2016, 87(5): 051905.
[53] EHRET G, LAUBACH S, SCHULZ M. Flatness metrology based on small-angle deflectometric procedures with electronic tiltmeters[J]. Proceedings of SPIE, 2017, 10326: 1032604.
[54] MING L, SHANZHI T, FUGUI Y, et al.. Optical metrology at BSRF[C]. Advanced Optical Manufacturing Testing Technologies, 2016.
[55] XUE J P, HUANG L, GAO B. One-dimensional stitching interferometry assisted by a triple-beam interferometer[J]. Optics Express, 2017, 25(8): 9393-9405.
[56] HUANG L, XUE J P, GAO B. One-dimensional angular-measurement-based stitching interferometry[J]. Optics Express, 2018, 26(8): 9882-9892.
[57] HUANG L, IDIR M, ZUO CH. Two-dimensional stitching interferometry based on tilt measurement[J]. Optics Express, 2018, 26(18): 23278-23286.
[58] 陈善勇. 非球面子孔径拼接干涉测量的几何方法研究[D]. 长沙: 国防科学技术大学, 2006.CHEN SH Y. Geometrical approach to subaperture stitching interferometry f aspheric surface[D]. Changsha: National University of Defense Technology, 2006. (in Chinese)
[59] 侯溪, HOU X, WU F, 伍凡, 杨力, YANG L. Layout model and analysis of annular subaperture stitching technique for testing large aspheric mirror[J]. Optics and Precision Engineering, 2006, 14(2): 207-212.
[60] 王孝坤, WANG X K, WANG L H, 王丽辉, 邓伟杰, DENG W J. Measurement of large aspheric mirrors by non-null testing[J]. Optics and Precision Engineering, 2011, 19(3): 520-528.
[61] 李长春, LI CH CH, CHENG G M, 程国民, 曹永刚, CAO Y G. Evaluation and simulation of auto-focus system speed[J]. Chinese Journal of Liquid Crystals and Displays, 2019, 34(5): 515-520.
[62] ZHAI D D, CHEN SH Y, PENG X Q. Absolute profile test by multi-sensor scanning system with relative angle measurement[J]. Measurement Science and Technology, 2018, 29(11): 115205.
[63] SHI Y N, XU X D, HUANG Q SH. Development of relative angle determinable stitching interferometry for high-accuracy x-ray focusing mirrors[J]. Proceedings of SPIE, 2017, 10385: 103850M.
[64] FREISCHLAD K R. Absolute Interferometric testing based on reconstruction of rotational shear[J]. Applied Optics, 2001, 40(10): 1637-1648.
[65] 张敏, ZHANG M, 隋永新, SUI Y X, YANG H J, 杨怀江. Mechanical error compensation algorithm for subaperture stitching interferometr[J]. Optics and Precision Engineering, 2015, 23(4): 934-940.
[66] MURPHY P, FORBES G, FLEIG J. Stitching interferometry: a flexible solution for surface metrology[J]. Optics and Photonics News, 2003, 14(5): 38-43.
[67] NICOLAS J, NG M L, PEDREIRA P. Completeness condition for unambiguous profile reconstruction by sub-aperture stitching[J]. Optics Express, 2018, 26(21): 27212-27220.
[68] ASSOUFID L, BRAY M, SHU D M. Development of a linear stitching interferometric system for evaluation of very large X-ray synchrotron radiation substrates and mirrors[J]. AIP Conference Proceedings, 2004, 705(1): 851-854.
 下载: 617次


